
Introduction
Beekeeping has grown in popularity as people seek to support struggling bee populations and enjoy the sweet rewards of home-harvested honey. Setting up your own beehive can be a rewarding project – whether you’re a local farmer, a craft lover interested in beeswax and honey, or a family looking for a fun educational hobby. Besides helping the environment, you’ll get to experience the magic of honeybees up close. (After all, a single jar of local honey can be quite valuable – 1 lb may fetch around £6!) This friendly guide will walk you through the basics of starting a beehive at home in an educational and accessible way.
Why Keep Bees?
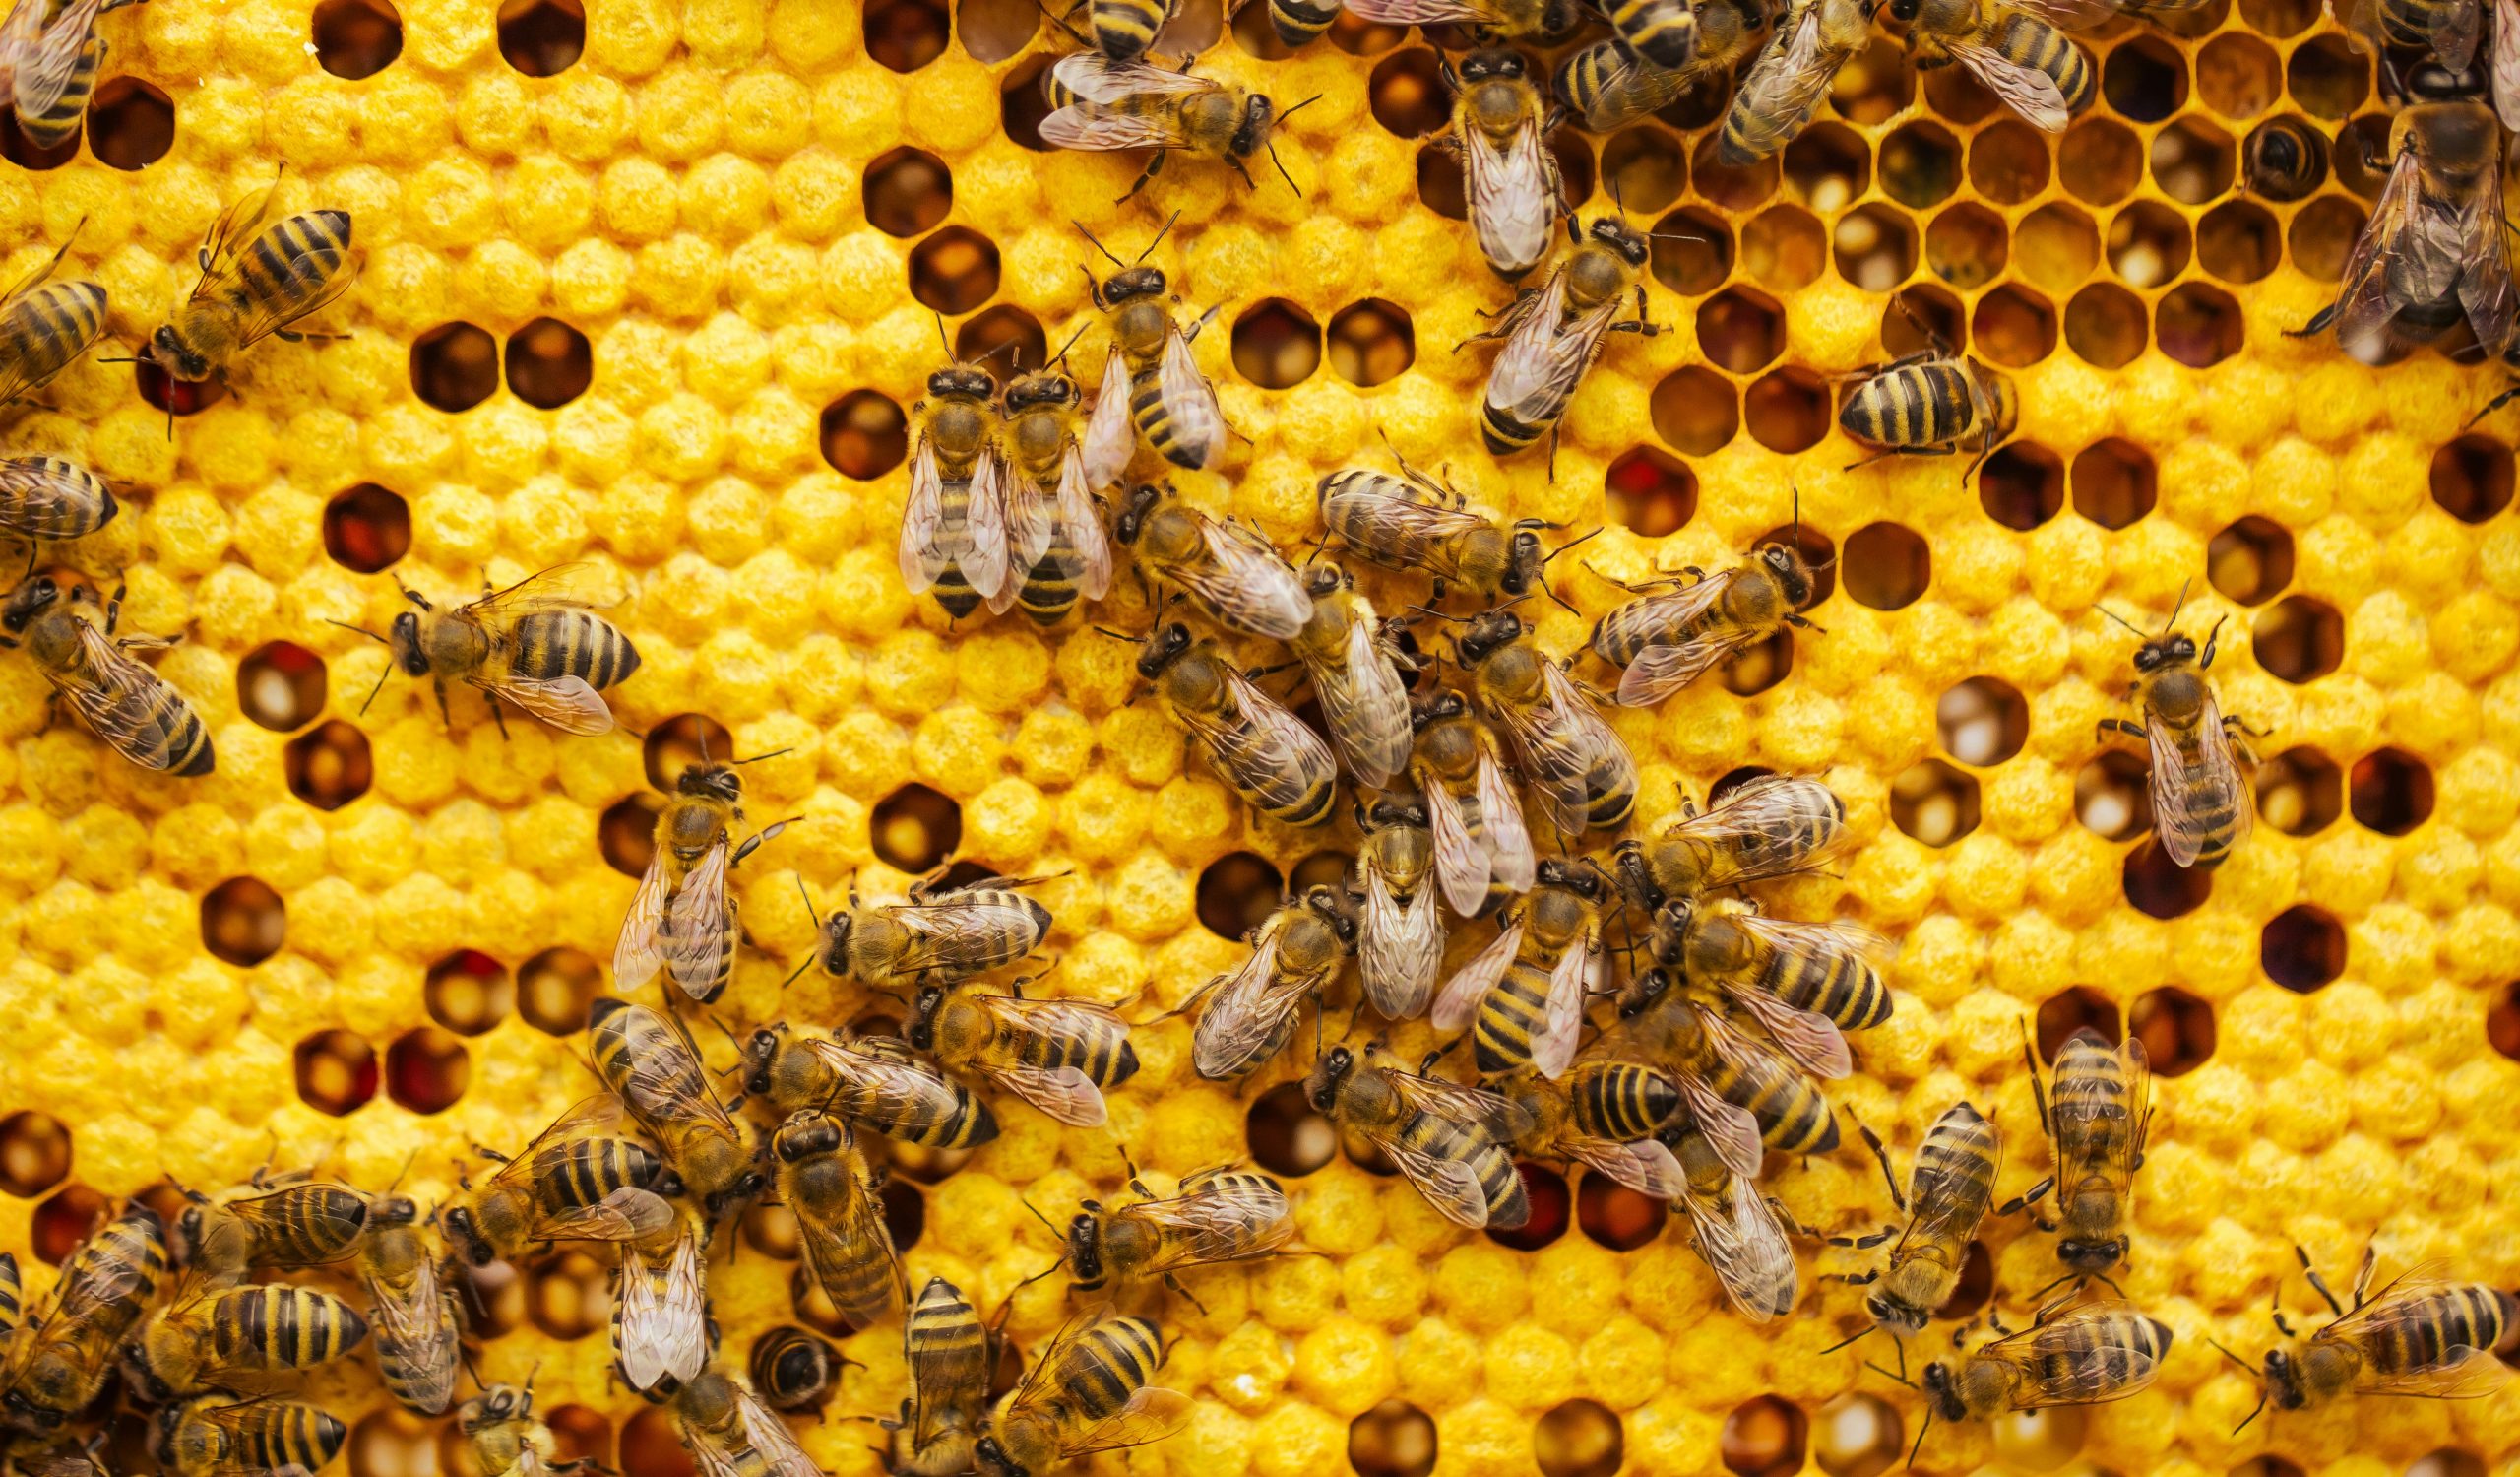
Beekeeping offers many benefits: you can produce your own honey and beeswax, contribute to pollinator conservation, and enjoy a fascinating hobby that connects you with nature. Honeybees play a crucial role in pollinating plants, so by keeping bees you’re helping your local ecosystem thrive. It’s also a great conversation starter and a chance to meet others – beekeeping communities are very welcoming to newcomers. And of course, there’s nothing quite like tasting fresh honey from your own hive or using beeswax for candles and crafts.
Before You Begin: Learn and Prepare
Keeping bees healthy and productive requires some knowledge and preparation. It’s wise to do a little homework before getting your bees. Start by reaching out to your local beekeeping association – for example, the British Beekeepers Association (BBKA) has area branches across the UK that offer advice and courses. Many local associations run beginner classes or “taster days” (often around 16–20 hours of instruction) to teach you the basics before you invest in equipment. Attending a course will help you understand bee care, seasonal tasks, and safety, and it might even connect you with an experienced mentor for your first year. Learning from seasoned beekeepers can give you confidence and answer the many questions that arise when starting out. In short, prepare by educating yourself – it will make your beekeeping journey much smoother.
Essential Equipment for Beekeeping
To set up a beehive, you’ll need some basic equipment and supplies. Here’s a checklist of the essentials:
- Beehive: A suitable hive box to house the colony (the most common type in the UK is the National Hive, though others like the Langstroth are also used). The hive includes internal frames where bees build their comb.
- Frames with Foundation: Rectangular wooden frames (usually with a wax or plastic foundation sheet) that fit inside the hive for the bees to build honeycomb on. You’ll need enough frames to fill your hive’s brood box (and supers for honey, later).
- Protective Clothing: A beekeeping suit or jacket with veil, plus gloves and ideally wellington boots. A full one-piece bee suit that covers you, including wrists and ankles, is best for beginners. This gear will greatly reduce the chances of stings.
- Smoker: A smoker is a tool that burns fuel (like dried grass, pine needles, or paper) to produce cool smoke. Puffing a little smoke into the hive calms the bees by masking alarm pheromones, making inspections easier.
- Hive Tool: A small pry bar or flat tool for separating hive parts and lifting frames. Bees seal everything with sticky resin (propolis), so a hive tool helps pry open boxes and scrape excess wax or propolis.
- Feeder: A feeder to give the bees supplemental sugar syrup, especially when they are starting out or when natural food is scarce. There are different styles (bucket feeders, frame feeders, etc.), but any container that allows bees to access syrup while being safe from drowning will work.
- Bees: Last but not least, you need your honeybees! Typically new beekeepers start with one nucleus colony (“nuc” – a small starter colony on a few frames) or a package of bees. We’ll discuss how to obtain bees in the next section.
Keep in mind that you can often buy beginner beekeeping kits that include a hive, frames, and basic tools – this can be convenient for first-timers. It’s best to start with new equipment if possible, to avoid the risk of diseases that can linger in second-hand hives. (If you do use used gear, ensure it’s thoroughly cleaned and comes from a disease-free apiary.) Always purchase the best quality you can afford, as it will last longer and perform better.
Choosing a Location for Your Hive
One of the first questions is where to put your beehive. Bees can be kept in many places – from large rural properties to small urban gardens or even rooftops – but careful placement is key for success. Ideally, you have a reasonably sized area with plenty of flowering plants around. In fact, one recommendation is an area of about half an acre (around 2000 m²) with a continuous supply of nectar-rich flowers through spring, summer, and autumn, plus a water source for the bees. Not everyone has that much space, but the point is to ensure your bees won’t go hungry. If you have a smaller garden, you can still keep bees; just be mindful to plant bee-friendly flowers and perhaps coordinate with neighbours so there are gardens or parks nearby for forage.
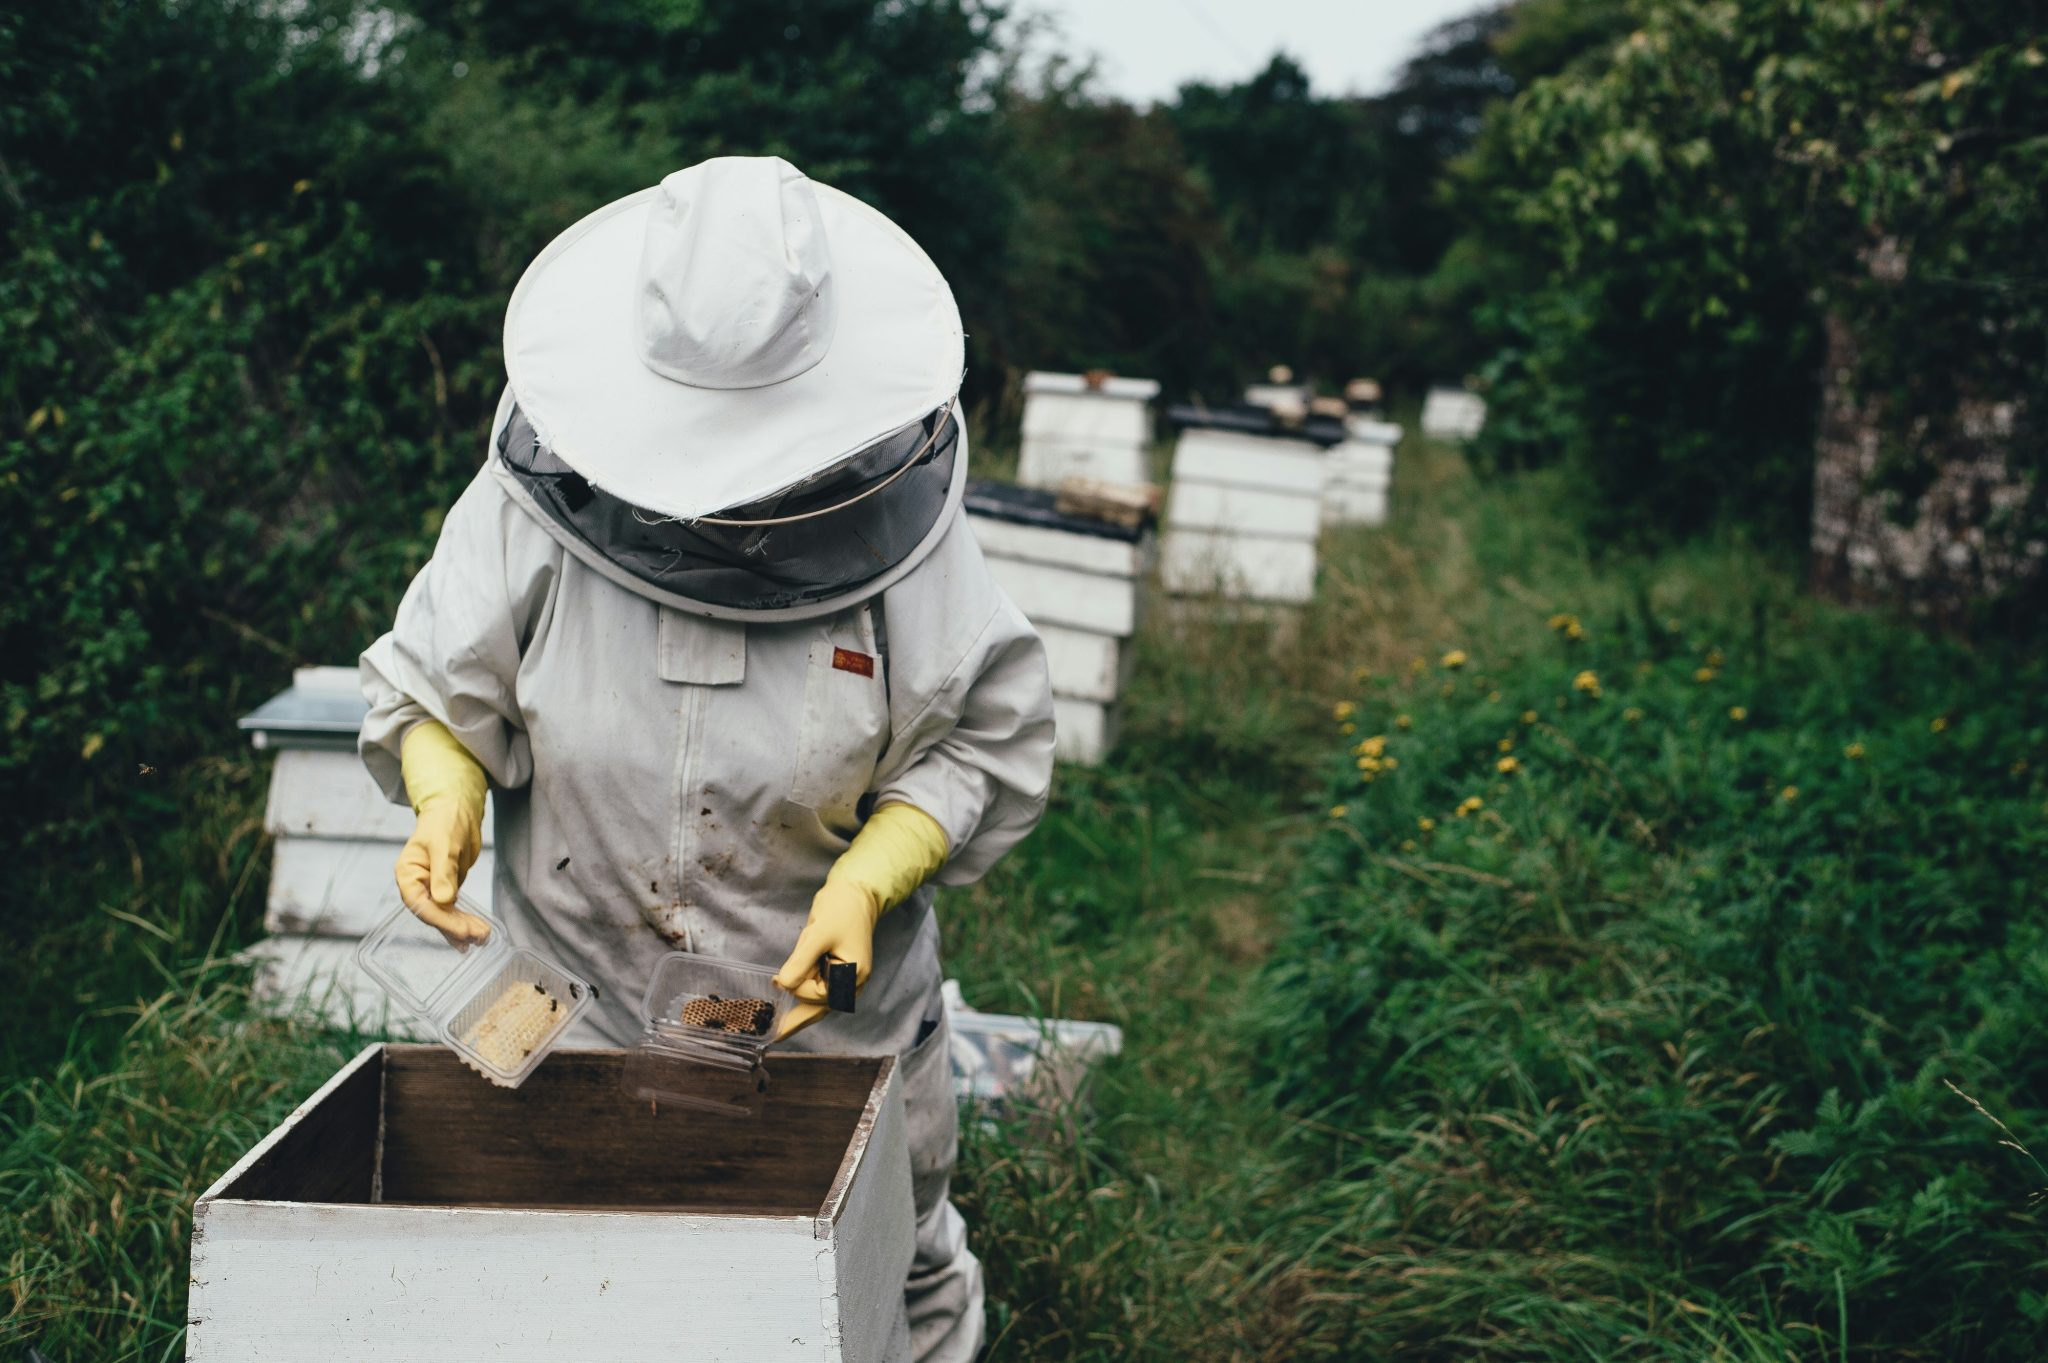
A beekeeper tending hives in a garden. Choose a good site for your hive that’s sunny, has flowering plants nearby, and is safe for both bees and people.
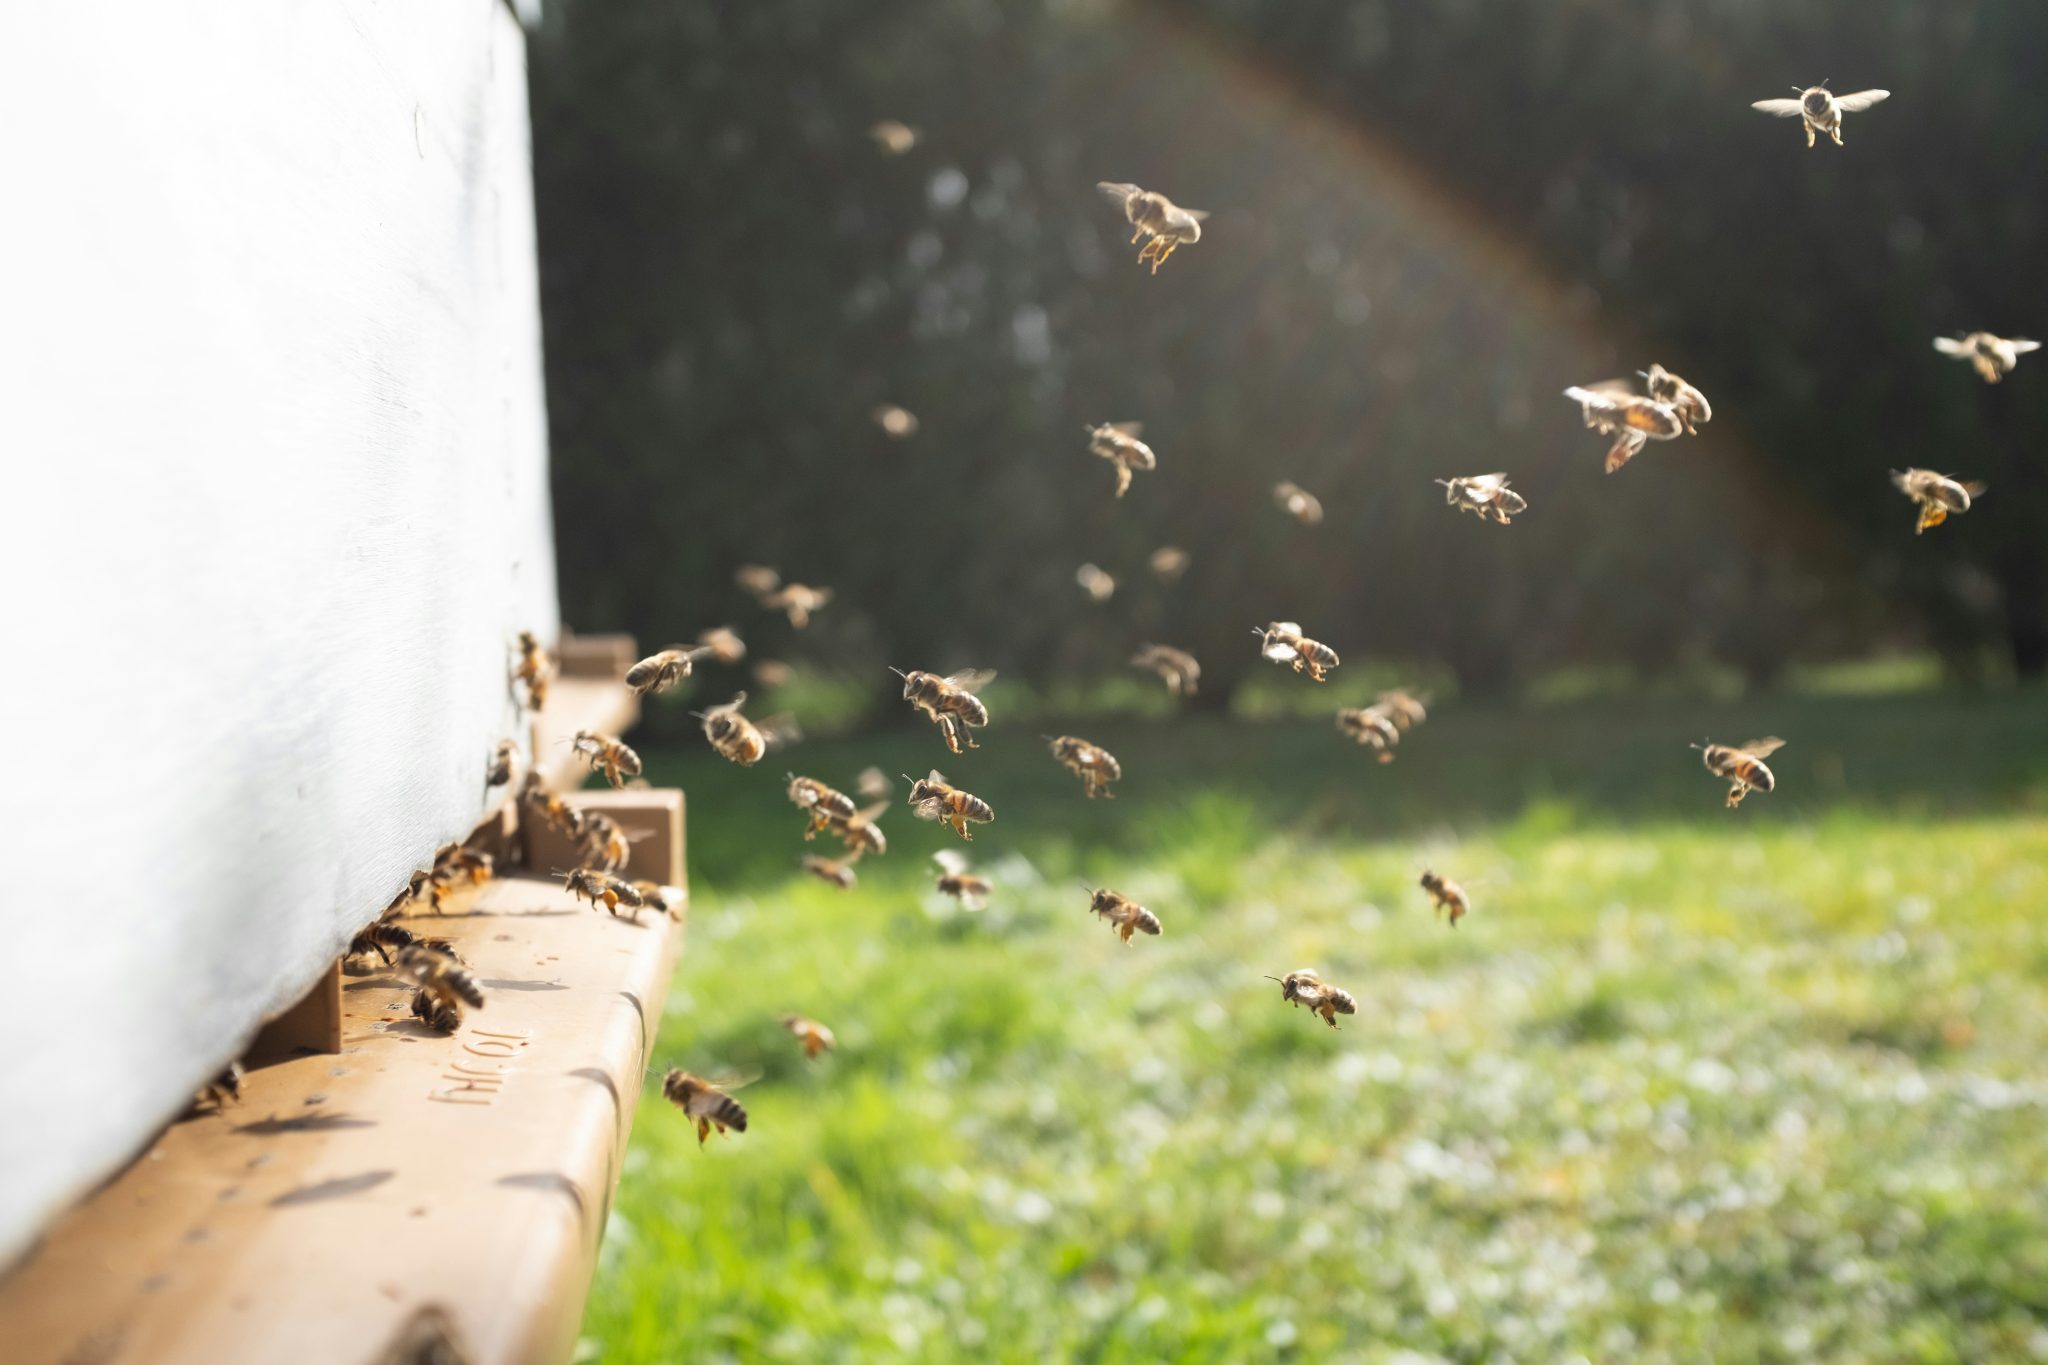
Hive Placement Tips: Pick a dry, sunny spot for your hive – bees kept in damp shade can become unhappy (and “angry bees” are no fun). It’s ideal if the hive entrance faces a barrier like a hedge or fence; this encourages the bees to fly upward when leaving the hive, so they quickly get above head height. By directing their flight path upward, you reduce the chance of bees bothering people at ground level (like neighbours or passers-by). Also avoid pointing hive entrances directly toward busy areas like a patio, a playground, or a sidewalk, to keep bee traffic away from those spots. If possible, have the hive entrance south or southeast-facing so it catches the morning sun – this helps get the bees active earlier on cool mornings.
It’s wise to put the hive on a stable stand, raising it about 30–50 cm (1–2 feet) off the ground. An elevated hive stays dry, avoids rot, and protects against certain predators or pests (in some regions, creatures like mice, raccoons, or even skunks might bother low hives). Even if those animals aren’t a concern in your area, a comfortable working height will save your back when you inspect the hive!
Don’t forget to provide a water source for your bees. Bees need water not only to drink but also to help cool the hive in hot weather. A simple solution is to set out a shallow container of fresh water (like a birdbath or a tray) with some pebbles or wood pieces in it – this gives the bees a landing spot so they won’t drown. Place it near the hive so the bees learn it’s their local “watering hole.” They prefer water that has natural minerals (even slightly mucky water or rainwater) over very clean distilled water, so don’t worry about it being too pristine. The important thing is accessibility and safety for the bees.
Finally, consider the surroundings and neighbours. Avoid close proximity to property lines if possible, so bees leaving the hive won’t immediately fly through a neighbour’s yard. If your garden is small or not ideal, you might arrange to keep your hive on a friend’s land or an allotment/farm – some landowners are happy to host beehives, especially in exchange for a little honey. (The BBKA even has an “Offer Land to Bees” scheme to connect beekeepers with landowners.) Open communication with neighbours is important – we’ll talk more about that in Safety and Neighbours below.
Getting Your Bees
With your equipment ready and hive set up, it’s time to bring in the bees! There are a few ways to obtain honeybees for a new hive:
- Buy a Nucleus Colony: This is often the best choice for beginners. A nucleus (or “nuc”) is a small starter colony, typically 3–5 frames from an existing hive containing a queen, workers, brood (eggs/larvae), and some food stores. Essentially, it’s a mini-hive that is already functioning. You can acquire nucs from local beekeepers or bee breeders – ask your local beekeeping association for recommendations. A small colony on 3–5 frames is ideal to start with, as it’s easier to manage and will grow with time. In the UK, nucs are often available in late spring or early summer (around June/July) once colonies have built up. Expect to pay on the order of £150–£200 for a good nuc of bees, though prices vary. The advantage of a nuc is that the bees are already on comb and established with a queen, so they generally get going faster.
- Buy a Package of Bees: A package is a ventilated box (often wooden or cardboard with screens) containing a few pounds of loose worker bees (usually around 10,000 individuals) and a separate caged queen. Packages can sometimes be ordered through mail or suppliers (common in some countries). For example, one standard package might be about 3 lbs of bees plus a queen, which is roughly equivalent to those same ~10,000 bees mentioned above. When the package arrives, you have to install the bees into your hive (we’ll explain how below). Packages are less common in the UK compared to nucs, and they require the bees to start from scratch on new comb. However, they are an option if nucs aren’t available. If you do get a package, make sure the bees are from a reputable source to avoid diseases.
- Catch a Swarm: In springtime, bee swarms (a ball of bees clustered in a bush or tree) can be caught and hived. Swarms are usually free – often local beekeepers or swarm collectors will be happy to give you one if you’re prepared to take care of it. However, swarms are not recommended for absolute beginners without guidance. While it’s exciting to catch a wild swarm, their temperament and health are unknown. The swarm could carry pests or diseases, or the queen might be old. If you do go this route, have an experienced beekeeper assist you. Many new beekeepers start with a swarm only after they’ve gained some confidence, or if a mentor is helping them. (On the bright side, a swarm is essentially a free colony – just use caution.)
Whichever method you choose, local bees are preferable. Bees that are adapted to your local climate will generally do better. The BBKA strongly recommends sourcing local bees and discourages importing bees or queens from far away. This helps prevent introducing new pests/diseases and ensures your colony is suited to your weather. So, tap into your local beekeeping network – often a fellow beekeeper can spare a nuc or a swarm when their hives are increasing.
How many bees will you be getting? A healthy new colony can be surprisingly large. For instance, a nuc or package typically contains on the order of 5,000–10,000 bees. It’s normal to receive a shoebox-sized package buzzing with thousands of little workers ready to call your hive home. Don’t worry – once they settle in, those bees will mostly stay around their hive and flowers, and they won’t all be flying at the same time!
One more tip: timing matters. Plan to get your bees at a time when the weather is mild and flowers are blooming (spring or early summer). This gives the colony a chance to build up and gather food before winter. Most suppliers won’t send out bees outside of the appropriate season anyway. If you’re taking a course or have a mentor, they will guide you on the best timing in your area.
Setting Up the Hive and Installing Bees
Now for the exciting part – setting up your hive and introducing the bees to their new home. It’s a good idea to do the installation on a calm, mild day if possible. Have your protective gear on and your smoker lit and ready (even if your bees are gentle, a little smoke can help keep them calm during the transfer). Also prepare your sugar syrup (if you’ll be feeding the bees) ahead of time.
- Assemble and Place the Hive: If your hive came flat-packed, assemble the boxes and frames according to instructions. Place your hive on its stand in the location you chose earlier. Make sure you have everything: the bottom board (floor), the brood box with frames, an inner cover (if used), and the roof ready to put on top. Have your feeder and syrup nearby as well.
- Transfer the Bees into the Hive: The method will differ slightly depending on whether you have a nucleus or a package of bees:
- If you have a nucleus colony: Set your nuc box next to the prepared hive. Gently open the nuc (a bit of smoke at the entrance can be used if needed). One by one, lift out each frame from the nuc and place it into the center of your hive’s brood box. Keep the frames in the same order and orientation as they were in the nuc – this preserves the brood nest layout. Be careful to find the queen during this process; ensure she gets into the new hive (usually she will be on one of the frames, just be gentle and do not squish or drop that frame). It’s a good idea to have an extra hive tool or helper to brush any clinging bees from the nuc box into the hive. Once all nuc frames and bees are transferred, fill the remaining space in the brood box with the extra frames you had prepared. Finally, close up the hive with its inner cover and roof. Place the now-empty nuc box on the ground in front of the hive – remaining bees in the nuc will smell their colony and move into the hive shortly on their own.
- If you have a package of bees: Remove a few frames (2–3 frames) from the center of the brood box to create a gap before you begin. (This gives you room to pour the bees in.) Typically, the queen in a package comes in a small separate queen cage – take that out first and keep it aside (more on the queen in a moment). Now, take the package of bees (which is basically a box full of buzzing workers) and spritz the bees lightly with sugar water. The sugar syrup mist coats the bees and helps to calm them (plus gives them something to sip). After a few minutes, you’re ready to pour them in. Turn the package box over above the open hive and give it a firm shake or two. Shake the bees into the hive through the gap you made – you’ll see a big clump of bees fall into the hive. Don’t worry, they won’t all fly; many will cling together and quickly start exploring the frames. You might not get every last bee out, and that’s okay – you can set the package box down near the hive entrance and the stragglers will eventually come out and join the others. Gently replace the frames you removed earlier, sliding them back in slowly to avoid crushing any bees. It’s normal that some bees will be crawling on the frames and box edges; just nudge them softly out of the way as needed.
- Introduce the Queen: In a nucleus transfer, the queen is already roaming on the frames you moved, so you don’t need to do much – just make sure she ended up in the new hive with her bees. In a package, however, the queen comes in her own little cage because she is new to the worker bees. Take a look at the queen cage: it’s usually a small tube or box with a candy plug sealing the exit. Double-check that the cage has a candy plug (if it has a cork or cap, you’ll replace that with a soft candy like a marshmallow). The idea is to allow a slow release of the queen – the workers will chew through the candy over a day or two, which gives them time to get used to her smell. Remove the cork and insert a marshmallow or candy if needed, to act as a time-delay plug. Then hang or place the queen cage in between two central frames in the brood box (often it can be wedged or attached so it hangs between frame top bars). The workers will cluster around the cage, tending to the queen through the mesh and gradually gnawing the candy. In about 1-3 days, they will free the queen, and because they’ve been exposed to her pheromones during that time, they should accept her as their queen.
Tip: Make sure the cage’s exit hole is not facing downwards (in case the queen were to fall out before climbing onto the comb). Face it sideways or upward between the frames. In a couple of days, you’ll come back to ensure the queen is out and alive (more on that soon).
- Feed the Bees: A new colony will need some help to get started, especially if there isn’t a heavy natural nectar flow at the moment of hiving. Right after you’ve placed the bees in the hive (and the queen cage is secured), it’s time to give them a sugar syrup feed. Most beginners feed a 1:1 or 2:1 sugar water solution (the ratio can depend on season – 1:1 is common in spring). You can use a jar or feeder filled with syrup. One simple method is an inverted jar or bucket feeder: fill it with syrup and poke a few tiny holes in the lid, then invert it over the hole of the inner cover or above the frames. The vacuum will prevent it from just pouring out, and the bees can sip the drops that come through the holes. Alternatively, use any feeder your system came with. Place the feeder on the hive, following the product’s instructions – some sit over the inner cover hole, some replace a couple of frames inside, and others are external. The key is that the bees have easy access to the syrup. In the first week or two, the bees will use this extra food to start building wax comb and to feed the developing brood. Continue feeding for as long as the bees aggressively take the syrup, and then taper off once they have a good handle on foraging from flowers. If it’s springtime with lots of blooms, they might only need a few weeks of feeding; if the weather is poor or you started late in the season, feeding may be needed longer. (Important: do not add syrup or sugar inside the hive when honey supers are on and you intend to harvest honey – that’s later in the season. For now, when starting, there’s no honey to harvest, so feeding is fine.)
- Final Assembly and Let Them Settle: After the bees are in and fed, reassemble any remaining hive parts. Put on the inner cover (if you haven’t already) and the hive roof. Ensure everything is secure. At this point, it’s usually best to close up the hive and step back. The bees need some peace and quiet to reorganize themselves in the new home. Plan to leave them largely alone for the next several days – about 3–5 days is a common recommendation. During this time, they will release the queen (if caged) and she’ll start laying eggs if all goes well. The workers will draw out wax on the new frames and begin storing nectar and pollen. It’s hard to resist peeking, but it’s in the bees’ best interest that you not disturb the hive immediately after installation. Let them do their thing. You can observe from outside – you should see bees starting to come out and orient to their new surroundings within a day. Make sure they have access to the feeder and your water source nearby.
After a few days (say, 5 days later), choose a good moment to inspect the hive briefly. This first check is mainly to confirm that the queen has been released from her cage and hopefully located by the colony. Remove the queen cage – if she’s still inside (rare), you might need to manually release her. If she’s out, look on the frames for signs of her: the best sign is finding eggs or young larvae in the cells, which indicate the queen has been laying. You might also try to spot the queen herself, though she can be shy right after installation. If you used a nuc, you’d do a similar first inspection around 1 week after hiving, to ensure the queen is laying in her new home.
Congratulations – you’ve set up your beehive and successfully introduced your bees!
Caring for Your Bees: Hive Management Through the Seasons
Once your hive is established, beekeeping becomes a regular routine of observation and care. The good news is, it’s not an everyday chore like some pets or livestock – bees largely take care of themselves – but you do need to check in on them periodically. Beekeeping is a seasonal activity, and the time commitment changes over the year.
- Spring and Summer (Active Season): This is the busiest time for you and the bees. Expect to inspect your hive roughly once per week during late spring and summer. A typical inspection involves opening the hive, pulling out frames, and checking the status of the colony. You’ll be looking for things like: is the queen present and laying eggs? Are there queen cells (which could indicate swarming preparations)? Do the bees have enough space to expand (if the brood box is getting full, you might need to add a honey super)? Are there any signs of pests or diseases? Regular inspections help you catch problems early and manage the hive’s growth. Swarm control is a big task in mid-season – if bees get crowded, they may try to swarm (half the bees leave with a new queen), which you want to prevent by giving them space or intervening. Each inspection can take anywhere from 15 minutes to an hour, depending on your hive size and what you find. For a beginner with one hive, plan on maybe 30 minutes of hive work per week on average during the warm months. (If you have two hives, double that time – about an hour a week, which might be one longer session or two shorter checks.)
- Autumn (Fall): By autumn, you harvest any surplus honey (more on that below) and then prepare the hive for the coming winter. Inspections become less frequent as temperatures drop, but you’ll still check if the bees have enough food stored for winter. If not, autumn is when beekeepers often feed a heavy sugar syrup or specialized bee feed to top up the stores. You might combine or reduce colonies if one is weak, and you’ll add any winter protections needed (such as reducing the entrance to keep out mice, adding insulation or wrapping if in a cold area, etc.). These tasks are periodic rather than weekly.
- Winter: In winter, bees cluster inside the hive to stay warm and won’t be flying unless there’s a rare warm day. You do not open the hive in cold weather, as that could chill the bees. The good news: your “hive duty” in winter is very light – basically just to check occasionally from the outside. Ensure the hive entrance isn’t blocked by dead bees or debris, verify the hive hasn’t been knocked over by wind, and on a mild day you might briefly lift the lid to see if the bees still have food (or heft the hive to feel its weight as an indicator of stores). Generally, winter is a quiet time; you might spend only a few minutes every couple of weeks doing checks, if that. Many beekeepers use winter to attend to other tasks like cleaning spare equipment, reading up, or simply enjoying a break! The bees will survive on the honey and pollen they stored, and on any extra feeding you provided. Come early spring, you’ll start the cycle again by checking for the queen starting to lay and perhaps feeding a bit to stimulate growth if needed.
In summary, plan for regular hive checks during the active season – it’s essential for good beekeeping. Weekly inspections in spring/summer are recommended to keep your bees healthy and to prevent swarming by timely interventions. This active management is why having too many hives as a beginner isn’t advised; one or two hives is plenty to start. As one source notes, looking after a single hive might take roughly half an hour per week between April and October (plus some extra tasks around harvest time), whereas in winter you “occasionally need to inspect the hive externally – that’s it!”. Beekeeping can fit into a busy schedule, but it does require that consistent check-in during the warm months. If you’re going on holiday in summer, you may need a fellow beekeeper to mind your hive or at least make sure they don’t run out of space or have an issue while you’re away.
Safety and Neighbors
Keeping bees comes with responsibility – both for your own safety and for the peace of your neighbors. Here are some important considerations:
- Stings: Let’s address the elephant in the room – bee stings will happen. Even the gentlest bees can sting if they feel threatened, and as a beekeeper you’re going to have thousands of bees buzzing around. The good news is that most bee stings are more of an inconvenience than a danger. Typically, a sting causes some redness, swelling, or itching for a short time, and as you get stung occasionally, you tend to become a bit more immune or tolerant to it. Long-time beekeepers often report they barely swell up anymore from a sting. Proper protective clothing greatly reduces stings – wear your suit and gloves when inspecting, and you’ll likely go most sessions with no stings at all. It’s also important to learn gentle handling: move smoothly, avoid crushing bees, and don’t bang on the hive. Good handling keeps bees calm (most bees only sting when provoked or accidentally squished).
- Allergies: A small percentage of people are allergic to bee venom, and for them a sting can be serious. If you or a family member has a known severe allergy (anaphylaxis risk), you must take extra precautions – this could include having an EpiPen (epinephrine injector) on hand and ensuring immediate access to medical care. Some beekeepers who react badly still practice the hobby, but they are very careful and always carry emergency medicine. If you’re not sure about your allergy status, consider getting tested before starting beekeeping, or at least be very cautious initially. It’s also wise to inform your doctor that you’re taking up beekeeping – they might prescribe an EpiPen as a safety measure if they think you need one. The bottom line: respect the risks. Most people handle beekeeping fine, but you should be prepared for the occasional sting and know your own health situation.
- Bee Behaviour: Honeybees are generally not aggressive when they’re away from the hive (foraging on flowers, they won’t randomly sting). They mainly defend their hive if they perceive a threat. By placing the hive thoughtfully and using gentle inspection techniques, you minimize any aggressive encounters. Some strains of bees are more docile than others; getting your bees from a reputable source of gentle stock (often local mongrel/European honeybees or Buckfasts in the UK, for example) will make your experience nicer.
- Neighbors and the Public: If you keep bees at home, you should consider your neighbours’ comfort and safety. It’s a great idea to talk to them before you set up your hive. Explain what you’re doing, address any concerns they have – many people’s fear of bees comes from not understanding them, so you can mention that honeybees are generally docile and only sting in defense. You might find your neighbors are excited about the idea of local bees pollinating their flowers or the prospect of some honey down the line. However, some might be nervous or opposed; it’s better to know that before you invest in all the kit. If a neighbor has a severe bee allergy, for instance, you’d want to take that into account very seriously. Often, simple measures like the hive placement (as discussed, keep it facing inward/away from their property and use hedges as barriers) will satisfy concerns. Also, assure neighbors that you will manage the hives responsibly (prevent swarms, etc.). Goodwill goes a long way – you might even offer a jar of honey in the future as a friendly gesture. By being transparent and considerate, you can avoid problems and maybe even recruit a new bee-loving friend next door!
- Legal and Local Regulations: Check if there are any local regulations about beekeeping. In the UK, there’s generally no license required to keep bees, but if you’re in a rented property or allotment you may need permission. Some local councils or housing associations have guidelines. It’s also courteous to inform close neighbors as mentioned. Additionally, be aware of any nuisance laws – if your bees repeatedly bother someone (e.g. lots of bees in a neighbor’s garden pond), you should mitigate that (like provide your own water source as described).
- Health and Safety: Aside from stings, consider other safety aspects. When lifting hive boxes full of honey, they can be heavy – lift with proper technique or get help to avoid back strain. If you’re working on a roof or high location (urban rooftop beekeepers), ensure you follow all safety protocols for fall prevention, etc. Keep your smoker usage safe – it’s a fire source, so don’t place it on dry grass or wood, and have a way to extinguish it properly. These are common-sense things, but worth keeping in mind.
In short, bee safety is about protecting yourself (wear gear, know your limits), and public safety is about managing your bees so they don’t become a nuisance. Most hobbyist beekeepers in towns and villages keep hives with no trouble at all – you might not even know someone nearby has bees until they tell you! By following the guidance here, the risk of issues is very low. And as an added bonus, by the time you harvest your first honey, those initially skeptical neighbors might be all smiles when you share a taste of the golden results.
Harvesting Honey and Other Rewards
One of the most satisfying moments for a new beekeeper is harvesting your own honey. However, patience is key – you may not get a large honey harvest in your first year of beekeeping, and that’s normal. The bees need to draw out comb and grow their colony initially, so often they consume most of what they gather in the first season to build up their home. Don’t be discouraged; if the colony thrives, you’ll likely be rewarded in the next year.
In a good season, a strong hive can produce a substantial surplus of honey. On average, a mature hive might yield about 30–50 lbs of honey in a year. (That’s roughly 10–20 kilograms, or 15–25 standard jars of honey.) Some exceptional hives in great weather can give even more, and of course a bad season (or a new small colony) might yield little to nothing. Beekeeping has its ups and downs, so any honey you get the first year is a bonus. It’s often said, “Take what the bees can afford to spare.” You should only harvest honey that is surplus to the bees’ needs – they must have enough to survive the winter. Your local beekeepers or mentor can guide you on when and how to take honey off safely. Typically, the main honey harvest in the UK is in late summer (August or early September), once the bees have finished collecting from the summer flowers.
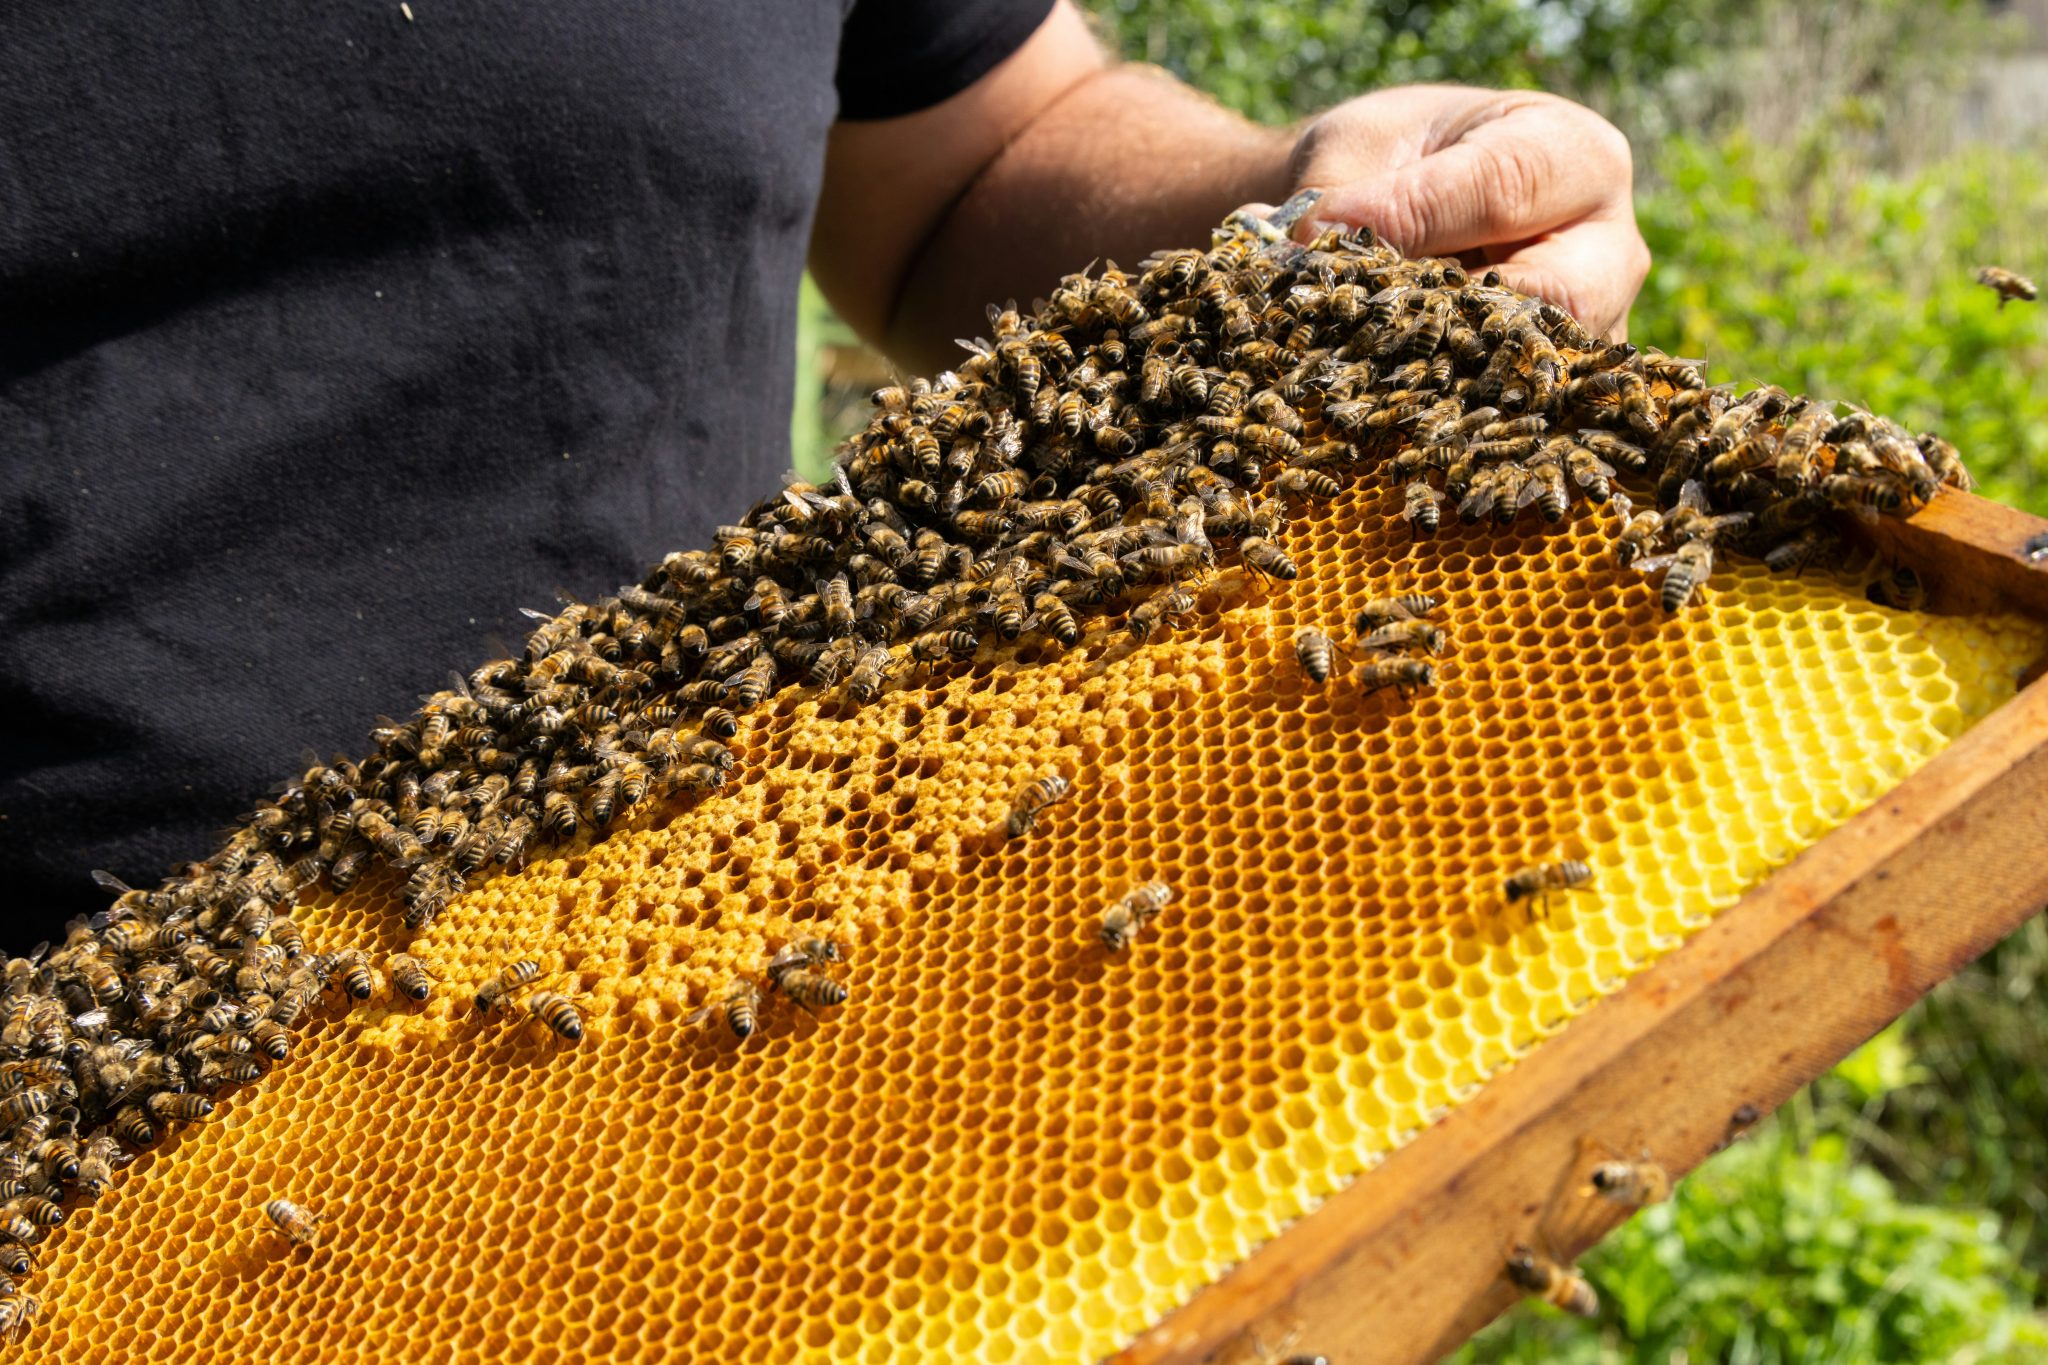
When the time comes to harvest, you’ll remove frames full of capped honey, replace them with empty frames for the bees, and then extract the honey from those frames (using either an extractor or the crush-and-strain method if you don’t have fancy equipment). It’s a delightful (and sticky!) process. Fresh, raw honey from your own hive has a flavour unique to your area’s flowers – truly a taste of local terroir. It might be light and floral if your bees feasted on clover and lime tree blossoms, or darker and richer if they foraged on heather in late summer.
Beyond honey, your bees will also produce beeswax, which you can collect from the hive (usually from cappings when you extract honey, or from old comb that you rotate out). Beeswax is treasured by craft lovers – you can make natural candles, soaps, lip balms, polish, and more. If you’re into crafts, having your own source of pure beeswax is wonderful. It’s another payoff from your beekeeping hobby.
There are also intangible rewards. You’ll gain a deeper appreciation for nature and the seasons as you watch your bees navigate the world. Many beekeepers talk about how relaxing it is to simply sit near the hive and watch the bees come and go – it’s called “bee TV”. You’ll inevitably learn a ton about biology, weather, plants (you might even start gardening more to help your bees), and working in harmony with these amazing insects. If you have kids, beekeeping can be an incredible educational experience for them, fostering respect for creatures and patience in management.
Continuous Learning and Support
As you set up your beehive and go through the first year, remember that no one becomes an expert overnight. Beekeeping has a learning curve, and even seasoned beekeepers are “continually learning and gaining experience over many years”. Don’t be afraid to seek help and advice. Your local beekeeping association (or mentor) is an ongoing resource – they can help if you encounter problems like a strange bee behavior or a possible disease in the hive. There are also many good books, forums, and websites dedicated to beekeeping where you can ask questions. The beekeeping community is generally very friendly and happy to assist newcomers.
Most importantly, enjoy the journey. There will be challenging moments (like when your bees outsmart you and swarm anyway, or when you get your first sting in an awkward spot!), but there will be far more moments of joy and wonder. The first time you see your bees dance (yes, they do a “waggle dance” to tell each other where flowers are), or when you taste that first spoonful of honey, you’ll know it’s all worth it. By setting up a beehive, you are not only gaining a rewarding hobby for yourself but also helping keep the vital tradition of beekeeping alive and supporting your local environment.
Good luck with your beehive setup, and welcome to the world of beekeeping!
Remember: start small, stay curious, and savour every sweet moment.

